Saturday, October 19, 2013

Spider Baby


My husband sits on the Board at the local YMCA where they had a Halloween Party this week. Mick and I were invited, so as soon as I heard, my creative juices started flowing with ideas for a mommy/baby costume with the baby carrier. I had a bunch of ideas, but when I went to the store to find parts and pieces to assemble, I couldn't quite find everything I needed. Instead, I came across an adorable, knit spider hat and it all fell into place from there!

I assembled this spider & web costume as follows:
Baby - black, long sleeve onesie, black pants, black spider hat (found at Babies R Us, Halloween bib optional if you have a drueler like mine, socks to keep the toesies warm
Mom - black, long sleeve shirt, black leggings, black socks & shoes, Halloween stretchable cob webbing
Carrier - baby carrier, spider web rug (dollar section at Target) or black fabric with cob web stretches across, safety pins

Dress baby & mom all in black, stretch cob web all over mom, put baby carrier on, use safety pins to pin spider web rug or black fabric onto front of carrier, put baby in carrier - be sure the safety pins are in a safe place where baby can't accidentally unpin them. Add spider hat. Viola! Cutest spider and web EVER!

We had many compliments on this and had over 75 Facebook Likes in 1/2 a day. 


Sunday, September 22, 2013

Fun Fall Photos

After our chili & the depressing Packer game today, we decided to do a little fall photo shoot. The baby did great - a perfect model!!
If you like these, search for Babbleheads Photography on Facebook ( www.facebook.com/Babbleheads ) to Like and see more!


Easy Crock Pot Chili

Today is officially the first day of fall, so what better way to celebrate than with a crock pot of chili, corn muffins and football! Our favorite Sunday food is chili - it's just so perfect on a cool, fall day. And to enjoy it in front of the TV with our favorite NFL team playing - well that's just Heaven!
I typically just throw whatever I have in the pantry into the crock pot for our chili and sometimes it tastes better than others. But, today the chili tasted exceptionally delicious, especially when paired with fresh-from-the-oven Jiffy corn muffins! I'll share the chili recipe below. It's so easy - you just throw everything in the crock pot and let it cook. In 4 hours, you've got delicious chili!

Easy Crock Pot Chili

Ingredients:
1 medium onion - chopped
1 bell pepper (any color) - chopped
2 garlic cloves - minced
2 cans of beans, drained & rinsed (choose 1-2 of the following types: pinto, black, kidney & garbanzo)
1 large can crushed tomatoes
1 small can tomato paste
3 cups chicken or vegetable stock
1 pound ground beef or turkey (uncooked)
1 Tablespoon salt
1/2 Tablespoon black pepper
1 teaspoon cumin
1 teaspoon cayenne (more or less depending on desired heat level)
1 teaspoon chili powder

Directions:
Dump all ingredients into the crock pot (use crock pot bag for easy clean up). Cook on high for 4 hours - or longer. The longer it cooks, the better it tastes. Serve over cooked noodles with shredded cheddar cheese, sour cream & corn muffins/bread.

We love this recipe and since I have a picky eater for a husband, I was surprised. He typically hates onions, peppers - anything - in his food. I cut up the onions and peppers into larger chunks so he can easily pick them out, but still gets the flavor. (Another option I try, sometimes, is to grind those ingredients up in my food processor so he has no idea they're in the food - it's the texture he doesn't like)

Hope you enjoy your fall, your chili and your football...

Monday, September 16, 2013

Trying out my Photographic Eye

My husband bought me a nice camera for an anniversary gift. I've been wanting one for a while, so I was excited to finally get it! I started playing around with my camera and the editing software I bought to go with it and I'm having a lot of fun! I did a photo shoot with a friend last weekend and they turned out great! I will share a few here. I created a business page on Facebook called Babbleheads Photography, so check it out and Like if you enjoy the images. Also, if you know anyone in the Madison/Milwaukee/Green Bay areas, have them check me out! I'm offering free sessions when booked before the end of September to get more experience!

www.facebook.com/Babbleheads

I just love how these images turned out!!


Friday, September 6, 2013

Free Shutterfly Book

I received an email from Shutterfly for a free 8x8 photo book between now and Wednesday 9/11/2013. The code is "summerbook".
I love making photo books of just about anything - I made a book each with a different page for my 37 weeks of pregnancy to show off the photos, I have made wedding books, vacation books and just because books. It's a great way to keep your photos organized and all in one place without having to put prints into a big, thick album.
Enjoy!


Thursday, August 1, 2013

Pocket Full of Posies

Since joining the blogger world, I've recently discovered the world of blog giveaways! I had no idea how many blogs host giveaways with products sponsored by different companies! Of course I was determined to win SOMETHING in this world of giveaway blogs, so I started entering them left and right. As I was looking for giveaways on blogs, I discovered that sellers on Etsy also host giveaways.
Etsy is where I won my first (and only) giveaway prize from Posies and Petals. It was 2 cute flower headbands (she could have made them clips if I wanted, too). Since I don't have my own adorable, little GIRL to wear them (yet), I sent them to a friend who has one daughter and another on the way. But before sending, I couldn't resist taking a few pictures on a live model - (don't show these to my husband!) haha

I can't tell if he is thrilled or not impressed by Mommy's use of girly props on his head.

My favorite is the one on the right - it's hard to tell in the photo, but the center petals are shiny sequins!

Mick - you better hope you have a sister someday who Mommy can dress up, otherwise you're in for a long life of fashionably fantastic finds just like this one!

Remember to stop by Posies and Petals' Etsy Shop to browse her other offerings and order a cute headband or clip for your own baby girl (or boy)! :)

Saturday, June 22, 2013

Happy Father's Day!

This Father's Day was my husband's first, so I wanted to do something special! He did get me a little something for Mother's Day even though I was not even a mom quite yet. His birthday happened to be the same week as Father's Day, so we had quite the task on our hands - good thing I started thinking ahead of time!
Before I bought him anything, my husband said he wanted a few new drivers and woods (those are golf clubs for the non-golfers). The clubs he wanted were quite expensive, so that meant I had a very small budget to work with in regards to his special gift from our son and me.
I can't take full credit, because the idea was inspired by a similar-type gift that a friend of mine gave her husband on his first Father's Day, but I did all the props, poses, photos, editing and assembling myself (hey, that's a lot to do with a 3 week old!!)
I will post each picture I used as well as a photo of the final product! :)


This was a fun project and it was pretty simple and very inexpensive!
Before the baby was born, I bought several different fabric segments from Jo-Ann Fabric to make throw pillows and a quilt for the nursery. Since I never got around to that (yet!), I have a bunch of fabric to use as backgrounds in photos. So, I found the most neutral swatch of fabric and draped it over the side and floor of the deck creating a little studio. Since I know that natural light is the absolute best light for photos on any camera, I wanted to do them outside, so I chose the deck.
I found the wooden letters from Michaels - obviously for repeat letters in a name, you do not need multiple letters.
I used my iPhone 5 and took as many poses of my son with each letter as I could think of. Also, I took A LOT of photos...I wasn't afraid to snap TONS of pictures - my photo stream was probably clogged with over 50 pictures from this shoot! It was fun to see all his funny faces & body positions! Ooh! Another tip - we received the Boppy Newborn Lounger as a gift and even though I considered returning it (feeling that we had plenty of 'seats' to put the baby in as a newborn), I kept it and have found it the most useful of any seats, bouncers, swings or cradles! It's like a giant pillow with an indent in the middle to set the baby in. I put this under the fabric and it was a perfect place to pose the baby for photos.
I used the free photoshop expess app for the Apple App store to edit my favorite images, then had the photos printed with the Walgreens App. (It is a very useful app for printing from your iPhone!)
The hardest part was finding a 5-opening frame. I found one on Walmart's website, but of course I was last minute on this project, so ordering anything online was out of the question. I was able to find a 5-frame separate set on clearance at Kohl's, so I bought it and decided I could either get a new one or hang these 5 on the wall together somewhere.

Well, here is the final product!!


Daddy loved it and Mick loved giving it to him! Happy Birthday and Happy Father's Day!

The Best Chocolate Chip Cookies I've Ever Had!

When my husband bought my push present after having our son, it came with a few extra perks! I suppose that is what you get when you purchase a luxury vehicle like the Acura MDX! I can truly say that Roger Meeker at Acura of Brookfield took excellent care of us! First, they gave me a dozen beautiful, pink roses - and these weren't cheap roses either - they lasted a good 2 weeks before they started to wilt and I had to throw them away!!

Second, a couple of weeks after purchasing the car, we received a tin of delicious chocolate chip cookies as another "thank you" gift! The cookies were so addictive that my husband and I ate the entire dozen in 2 days! I know - that's horrible, especially if I'm trying to get back in shape after the baby! Haha The best part about these cookies though? They sent the recipe with them! How great is that?! I have made these cookies 3 times in the last week and they just do not stay around long! My husband just can't get enough and I he sees me eating one, he panics asking if its the last one!
I can't take credit for the recipe, but I do promise to share anyways, so that anyone who comes across this blog post can enjoy these delicious cookies as much as we have! I think the secret is in the butter flavored shortening and the full Tablespoon of vanilla extract!
Here you go!

The Best Ever Chocolate Chip Cookies (I did alter this title - haha)

Ingredients:
3/4 cup Butter Flavored Shortening
1 1/4 cup firmly packed brown sugar
2 Tablespoons milk
1 Tablespoon Real Vanilla Extract
1 egg
3/4 teaspoon baking soda
1 teaspoon salt
1 3/4 cups all purpose flour
1 cup chocolate chips

Directions:
Preheat oven to 375 degrees.
Combine shortening, brown sugar, milk and vanilla in large mixing bowl. Beat at medium speed of mixer until well blended.
Beat in egg.
Combine flour, salt and baking soda in a separate bowl. Mix into creamed mixture a little at a time until just blended.
Stir in chocolate chips.
Drop by teaspoonful 3-inches apart onto a greased cookie sheet. Bake at 375 degrees for 8-10 minutes for chewy cookies or 11-13 minutes for crisp cookies. DO NOT OVERBAKE!! After 8 minutes, cookies will not appear quite done, but take them out anyway; they will continue cooking on the cookie sheet outside of the oven.
Allow cookies to sit on cookie sheet outside oven for 2-3 minutes and then remove to aluminum foil to finish cooking.
Produces about 3 dozen cookies.

Please feel free to enjoy this recipe and pass on to your friends & family! Also, if you know anyone in the midwest looking for a new vehicle, send them over to Acura of Brookfield to see Roger and let him know we sent you! :)

Wednesday, June 12, 2013

iPhone Photography & Birth Announcements

The weather finally started to look up this week - it was hot, but at least the sun was shining and there were several days without rain!
Mick & I (and Maddie too) decided to take advantage of the nice weather by going for a couple of walks, spending some time out on the deck and holding our very own mini photography session!
I walked around the house collecting various items that might look good in a baby photo shoot and in the end came up with some fun poses and props! I'll share a few of my favorite shots below. The best part is...I used my iPhone 5 and Instagram for all the photos and editing. By using the angle of the sun and shade to my advantage, the photos turned out great and look like they were done professionally (in my opinion at least).


The best part is that I was able to use these photos (along with a few others I have taken and a couple family shots that we had professionally taken by Melissa from Crocodile Smiles Photography to put together our birth announcements on Shutterfly. (See Previous Post - Stationary Card)

Birth Announcent

Welcome Little One Boy Birth Announcement
Shutterfly has personalized baby birth announcement cards.
View the entire collection of cards.

Saturday, June 8, 2013

Postpartum Recovery - MUST REMEMBER!

Well, our little man is 18 days old today. The past 3 weeks have been quite hectic for our family and even though we've done A LOT (threw a last minute graduation party at our home, attended 2 graduation ceremonies, completed the nursery, went into labor, had a baby, attended our newborn/family photo shoot, visited both Mommy & Daddy's work with the baby, attended 5 doctor appointments AND cared for a newborn child), we still all sure feel like we haven't accomplished much in the last 3 weeks...we are walking zombies! "Well, what did we expect?!", you ask, "a walk in he park?" No, we expected it to be difficult, but no one and nothing can really prepare you for this change, no matter how many classes you take or what experienced parents tell you - you never really understand until you have gone through it yourself. This post is mostly for my own reference down the road when we decide to have baby #2 (yes, I'm past the point of very seriously never wanting to do THAT again), but if it helps others who decide to read it to better prepare for the postpartum recovery, I am so glad I can help! First, well before delivery, you will want to stock up on the following list - most things will need to be ordered online in advance, so do this early donut all arrives and you can organize it on time:

Americaine Hemorrhoidal Ointment Maximum Strength (soothes the area down under during recovery - and you go through it quickly by just squirting a generous amount on the ice pad before pulling up your undies)
Perineal Instant Ice Pads (HUGE lifesaver! If you only get one thing on this list, it should be this!)
Disposable Mesh Undies (wash them or throw them away...it keeps your regular undies clean and saves on gross laundry to have to do. Also more breathable and not as hot as other undies)
Peri Spray Bottle (only if your hospital doesn't provide one for you - most do)
Clean, soft rags (use these to pat yourself dry, then throw in the laundry - grossness alert! You might want to do this laundry load yourself instead of having a friend or family member help out!)
Ibuprofen (if your doctor can prescribe 600 mg, it s nice!
Prescription Pain Meds (my doc gave me Vicodin - I only took it for about 6 or 7 days, but it really helped!)
Miralax (I had such a hard time going #2 after I delivered - I'm talking 7 days! I was in so much pain because I really had to go and my body was giving all the cues - gas, back aches, cramps, bloaty feeling, the works - but it was so painful to 'push' it out. I kept telling my husband I wanted another epidural just to go to the bathroom! Haha! Then, on the 7th day, I met an angel, well, a nurse really. She suggested miralax and I was willing I try anything at this point! My husband rushed out to Walgreens and picked me up some Miralax powder to dissolve in my lemonade. I took the miralax, laid down for a nap and when I woke up, I pooped! I was so relieved, I started crying and hugging my husband and my in-laws who were visiting!)
Boppy (not really for your recovery, but it is nice for breastfeeding and if you fall asleep in the recliner with the Boppy, it's a little safer than without it)
Lots of pillows of different thicknesses (you thought you needed a lot during pregnancy? We went out and bought more after the first night home - I used 1-2 behind my head/shoulders, one on either side while sleeping on the recliner, one small one behind my lower back and one under my knees, plus my husband needed a couple...)
Thermal Fabric Receiving Blanket (our hospital used these for swaddling and they were huge lifesavers! I have not found anything better to swaddle my baby in - other blankets are just too small, not stretchy enough, not soft enough, but these thermal fabric blankets are just right! Double wrap with one of these and a swaddle wrap (see below) for a good, tight swaddle that Houdini himself couldn't escape!)
SwaddleMe Swaddle Wrap (wrap this over your baby after being swaddled in a thermal blanket for a good, tight swaddle - this was the only way to get our baby to sleep more than an hour!)
Lansinoh Pure Lanolin Nipple Cream (I only used this for the first couple of weeks, then my nipples got used to it and I really didn't use it anymore, but it was nice in the beginning for bloody, sore nipples)
Breast Pads
Nursing Bras (especially the sleep ones!)
Prepared Meals - frozen (either make these in advance yourself or ask friends/family to prepare freezable, homemade meals with instructions so your husband can easily pop them in the oven for quick meals - neither of you will want to cook!)

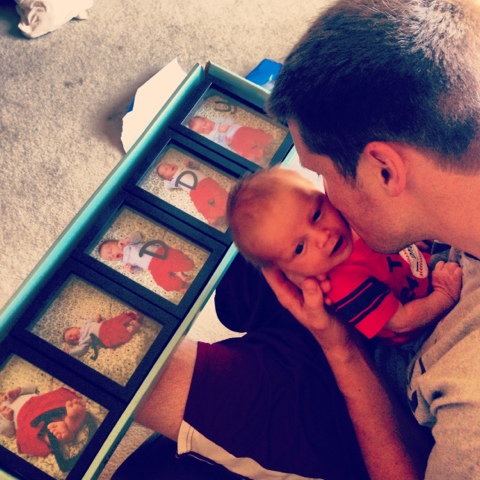
Photo below by Melissa from Crocodile Smiles Photography!

There may be some minor things I'm forgetting, but these are the main things I remember being must-haves!
Once again, this is mainly for my future reference, but if it helps other soon-to-be moms - great!

Just remember - the first week (maybe 2) is the worst and you regret it all so many times during that time, but the pain and the depression only last a little while (not beyond 2 weeks  - if it does, tell your doctor!) I felt ready to have another baby after the first 2 weeks were over, so I promise it gets better! And in a few weeks, you'll miss this time! Hard to believe now, but it's true! :)Crocodile Smiles Photography