Sunday, October 19, 2014

Busy Season

It's busy season at my photography business, Babbleheads Photography!
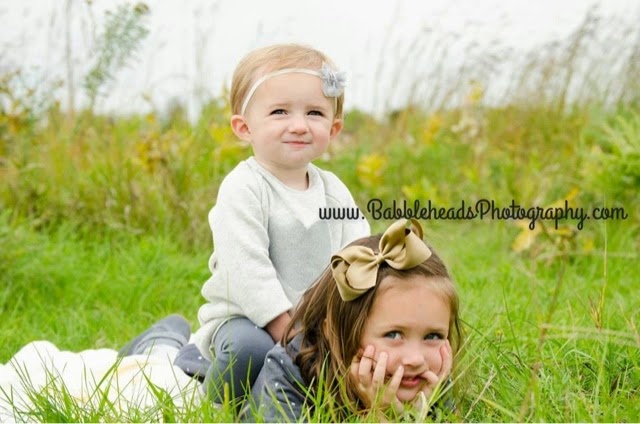
Here are a few of my favorite portraits from the season so far!

Visit my website:
Http://www.BabbleheadsPhotography.com or visit me on Facebook: Http://www.Facebook.com/Babbleheads


Wednesday, September 24, 2014

Whale Clip Art Free Download

There are quite a few free downloads out there on the internet! However, I can't always seem to find what I need when I need it. So, I had a client ask about whale invitations and I must say I am not a big fan of paying for clip art, so I decided to try my own shot at designing a whale in Photoshop Elements 12. It is not perfect by any means as it is the very first clip art by scratch I have designed myself. I posted it on my Etsy shope for fifty cents, but have had no hits yet and I realized that 1.) maybe it's just not as good of quality as many of the others out there and 2.) maybe there are a bunch of other people out there like me who don't like to pay for clip art. haha

I'm not claiming this is a "great" piece of clip art, but I am offering it for free for a period of time for personal AND commercial use! If you are using this commercially, please remember that I still created the design do not sell this as your own clip art, but you may use it in products that you sell. The only thing I ask is that you visit my Etsy shop, favorite my Etsy shop if you are on Etsy and favorite this listing as well as any others you may like. You can also share your love by visiting and liking my Facebook page and/or following me on Twitter @BabbleheadsPics and/or following me on Pinterest!

Please note that the downloadable file is a .png format in a .zip folder with a transparent background and downloaded via Dropbox. It contains the whale and spray only in the colors shown below. You can change the color in Photoshop if you know how or I can send you a different color if you want to purchase it through my Etsy shop.


Monday, September 15, 2014

Dogs can get mosquito bites?!


So, I had written this post over 1 year ago now and I realized that I never posted it. Normally when that happens, I just forget about it, but I thought this was too good of an FYI post to pass up! :)


Last summer, the humidity levels were high and it was raining a lot. When you pair that weather with a woodsy, wet backyard, you get an over abundance of Mosquitoes - yuck!
It was easy for the baby and I to stay indoors - we'd been avoiding the sun and heat for weeks, but my fur child (a yellow lab named Maddie) liked to sit out on the deck, especially when the baby was crying.
At one point, I was standing in the kitchen and when I looked down at Maddie she looked like she had a softball stuffed in her right cheek! It was all swollen and droopy. I started panicking, because I thought she was having a stroke, so I frantically called my husband at work. He said it was probably a bee sting and I should look it up, but could probably give her Benadryl. I popped open my laptop and found the dosage levels for a dog her size, then rushed on over to the nearest Walgreens. I gave her that Benadryl and waited. Maddie was again in and out of the house and the Benadryl seemed to work but only temporarily. Finally, I followed her out into the backyard to see what she was getting into and within MINUTES, her snout was covered in those little suckers! (mosquitoes!)
Well, needless to say, IN we went. She wasn't thrilled to be stuffed indoors until the mosquitoes calmed down, but it was for the best.
We never have had it that bad since, but we also switched over to the Vectra brand of pest repellent for our pup. We have had the best year free from ticks, fleas, mosquitoes and any other pests since using that brand! (Highly recommended - and this is not a paid review!) :)


Here are some photos to prove how bad her mosquito bites were!


 To start, here is a photo of Maddie normally without a giant schnoz:


And here are the freakish mosquito bite photos:


Poor Puppy!!! I'm glad she survived and that she hasn't had to endure this again since! :)

My Etsy Shop - BabbleheadsPaper

As many of you may know, I have started an Etsy shop to sell my digital designs and paper products to others who may be in need of customized design products. I wanted to share a few of my favorite items on TheWorkingWifey Blog.

So, from time to time, stop by my Blog or Etsy shop and check out my new items! And don't be afraid to contact me if you don't see what you want! My favorite items are custom orders!

Northwoods Digital Frame


Sunday, May 18, 2014

Little Man Mustache Bash First Birthday Party

This week my son turns 1. I can remember the day he was born like it was yesterday - it is so hard to believe how fast time flies and how much he's grown! Naturally, I had to plan an epic bash - and I decided pretty early on that it would be a little man MUSTACHE BASH! Well, now that the day is over, I can say with certainty that it was a true success! I was so pleased with the results and all the hard work I put into this party over the last several months really paid off.
Not to mention, I met some really great product vendors in the process and created some great things that I can post to my Etsy shop!!

A few of the highlights that I really liked about this party were the bow tie cookie decorating station, Pin the mustache on the Mick and the Photobooth. I rigged up my Nikon 5100 with a remote trigger, laid out some mustache and bow tie props and hung up a mustache backdrop - it was pretty cool! The rest was just in the details.
Please feel free to Pin and share this page - I would love if others are inspired by this fun theme I chose. Please share images of your party if this inspired you. And if you live in Wisconsin and are interested in having me photograph your event, please visit www.BabbleheadsPhotography.com!

Most of the printed products can be found at my Etsy shop BabbleheadsPaper and I can customize colors if you want a different color scheme! If you want a different theme, I can custom design something for you via an e-mail or over the phone consultation. Just let me know what you're looking for!
The awesome mustache backdrop was provided by PartySquare who has many more beautiful backdrops for use in photograph sessions, food table backdrops, photo booth backgrounds and whatever else you can dream up to use a backdrop for. If you're in the market for a backdrop, visit their Etsy shop!
The striped, paper straws were from PuppyCatCrafts on Etsy. This was my first experience and I have to say they were excellent quality and matched our theme perfectly!
The chocolate mustache pops were from Chocolaterie Stam: Fine European Chocolates. Not only did they look amazing, but they tasted fabulous! (And they ship!)


Monday, January 6, 2014

Christmas at our House

With it being our first Christmas with our tiny human, we chose not to travel, but instead invited the grandparents, aunts and uncles to our house. My family took us up on the offer and stayed for two nights. You know what that means - lots of food and drinks! And some cool presents too! Since I've been getting more and more into photography, it also included some fun photo shoots, mainly of the tiny human.

We do not have a fireplace at our home, so we needed to figure out a place to hang our stockings for Santa to fill. After a few months of stressing over what to do (although it had really been on my mind since we first moved into our house several years ago), I figured it out! We have a mini wine bar that was given to us as a wedding gift and it has been tucked away in a corner for the last 2 1/2 years. I hauled that puppy to our family room and rummaged the house for other supplies. I found 2 lanterns that I had bought several years ago from Gordman's as a decoration for our Halloween party, a pinecone wreath my mother-in-law gifted us a few years back and a personalized wooden sign my sister made as a wedding gift and I got to work organizing it all to look nice. I then picked out some stockings I liked at Kohl's and hung them with upside down hooks screwed to the inside of the drawers. The result was a festive-looking un-fireplace that got the job done and even looked nice.

 
Another special Christmas project I did this year was to create a personalized cookie plate for Santa! I wanted to do something unique and special to capture our tiny human's first Christmas, so I used his handprint to make a Santa on a ceramic plate. We painted a few more embellishments on the plate and baked it to set the paint. It turned out quite nice in my opinion. Look for instructions below.
 
 
Santa Handprint Plate Instructions:
 
Materials:
1 ceramic plate (I found mine at Michael's)
Non toxic ceramic paint (I used Martha Stewart paints)
  colors: red, white, tan, black, green
Q-tip, craft stick or paint brush
 
Directions:
Paint child's thumb and the heal of their palm red for Santa's hat. Paint the rest of their palm white for his beard. (If you have an older, cooperative child, you can paint the tan on the middle of their palm for Santa's face, but my 6-month old would barely keep his hands open to keep two colors separate, so we had to paint the face on later. Place their open hand in the middle of the plate to transfer paint. Wash their hand off thoroughly.
Paint fingers green and allow them to finger paint the outside edge of the plate. If you want, you can do this step first on the entire plate, then do the Santa over the other colors (the white beard may show up better this way).
Allow the original Santa handprint and other finger painting to dry completely.
Using a paintbrush or Q-tip, paint Santa's face with tan paint. Allow that to dry completely.
Using a Q-tip, craft stick or paint brush, paint the eyes, mouth and rosy cheeks (I mixed the red and white paint for a pinky rosy cheek). Allow to dry for at least 24 hours. Label the back of the plate with a Sharpie marker with the child's name and the year (you could also do this on the front of the plate with paint if you'd prefer).
Preheat the oven to 325 degrees Fahrenheit. Bake plate in the oven for 45 minutes, then turn the oven off and allow the plate to cool slowly in the oven.
Using your fingernail, scratch an inconspicuous area of the paint. If it scratches off, bake another 20-40 minutes in a 325 degree oven until completely dry. (should only have to repeat baking step if your paint is extra thick)
 
Ta-Da! You have a nice plate to serve Santa's cookies and a keepsake with your child's handprint!


Saturday, October 19, 2013

Spider Baby


My husband sits on the Board at the local YMCA where they had a Halloween Party this week. Mick and I were invited, so as soon as I heard, my creative juices started flowing with ideas for a mommy/baby costume with the baby carrier. I had a bunch of ideas, but when I went to the store to find parts and pieces to assemble, I couldn't quite find everything I needed. Instead, I came across an adorable, knit spider hat and it all fell into place from there!

I assembled this spider & web costume as follows:
Baby - black, long sleeve onesie, black pants, black spider hat (found at Babies R Us, Halloween bib optional if you have a drueler like mine, socks to keep the toesies warm
Mom - black, long sleeve shirt, black leggings, black socks & shoes, Halloween stretchable cob webbing
Carrier - baby carrier, spider web rug (dollar section at Target) or black fabric with cob web stretches across, safety pins

Dress baby & mom all in black, stretch cob web all over mom, put baby carrier on, use safety pins to pin spider web rug or black fabric onto front of carrier, put baby in carrier - be sure the safety pins are in a safe place where baby can't accidentally unpin them. Add spider hat. Viola! Cutest spider and web EVER!

We had many compliments on this and had over 75 Facebook Likes in 1/2 a day.